I love online tutorials. I learned so much from them and the bloggers who share them. So I thought I'd give back with a tutorial of my own. Nothing new, or original, just a simple sewn needle book.


This is my first tutorial. And it's actually more of a 'what not to do' than 'what to do'.
But you get to learn from my mistakes and I get to use some of my fabric scraps, so it's all good.
Let's get started!
What you'll need:

For the pocket: Cut another rectangle the same width as the other two, but make it half the height plus one centimeter for folding.
For the tab closure: More rectangles! Cut one of main fabric and one of lining.
The dimensions of this needle book are up to you: the main point is that the finished thing can hold your needles. Oh, and make sure that a snap closure can fit on the finished tab.
My dimensions were as follows: 18 cm x 13 cm for the main body parts, 18 cm x 8 cm for the pocket and 5 x 10 cm for the tab (I gave myself plenty of seam allowance for the tab, and ended up cutting most of it off). This gave me a finished needle-book that measures 15 x 11,5 cm when opened. Not the dimensions I was hoping for, but still, not too bad.
Iron all the pieces and add interfacing if your fabric is too flimsy. I ironed interfacing on the lining.
With right sides together sew around three sides of the tab (I ended up sewing it up to the dimensions of 3 cm x 10 cm, which was way too long. But more on that later). Trim the seam allowances and make sure to trim the corners to remove the bulk. This makes for a nicer corner when you turn the tab to the right side. So, do just that - turn the tab to the right side, iron it and topstitch around the three sewn sides.

Notice how my tab corners aren't exactly crisp and nice? This is because I didn't clip enough of the seam allowance off. I make these mistakes so you don't have to!
Take the pocket piece and fold down the top edge by one centimeter. Iron it, then topstitch it.

Ok, now let's make a sandwich!
Take your lining piece, place it right side up. Put the pocket on top of it, also right side up.
Take the tab and place it with its short unfinished edge on the center of the right side of the lining piece. The tab will be inside the sandwich, the tab's lining side is touching the lining of the needle book and the pocket, the outside fabric is facing up.

See this? All wrong!! Place the tab so that it sits about 2/3's from the center of the needle book. I ended up moving it - away from the giraffe, closer to the zebra. Again, I make these mistakes, so you don't have to ;)
Place the outside fabric right side down on the lining, the pocket and the tab. Pin everything so that it doesn't move around while you sew.
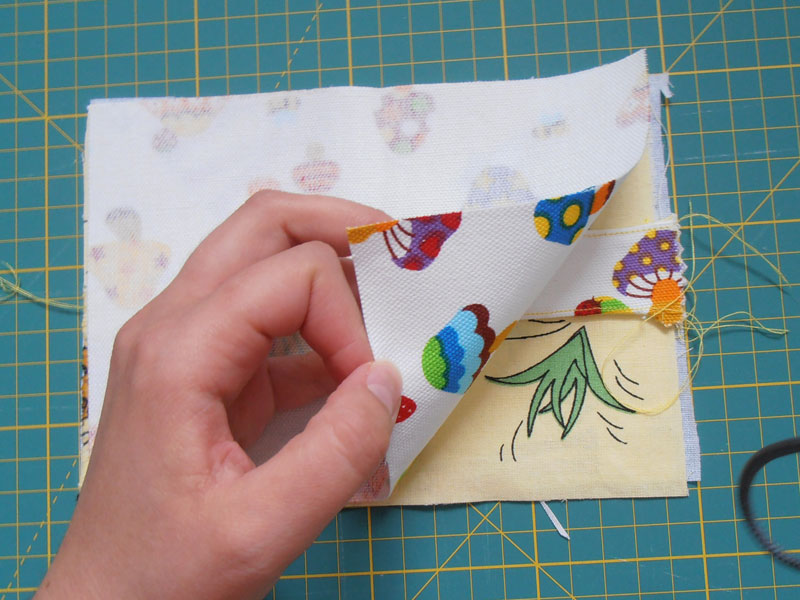
Sew around, leaving an opening to turn it. Like so:

See how much of the tab I had to move and cut off? I also didn't pin, so my tab isn't exactly centered. But you pinned, right?
Trim the seam allowances and clip the corners. Turn everything right side out, iron it and topstitch all around.


By topstitching you closed the hole you left for turning. And it looks nicer now. Hopefully your corners look prettier than mine.
Now it's time to cut the felt for the needle book pages. Just measure your finished book, subtract about a centimeter on top and one side (you don't want your 'pages' to stick out of the book) and cut the felt according to those measurements. Three felt rectangles make for six needle book pages. You can cut more if you've got a bazillion needles that you need to put in the book - just make sure your machine can stitch trough all those layers.
I've cut mine 14 cm x 9,5 cm.
Mark a line with a water soluble marker (or a pencil or something) down the center of the felt rectangles.

Place the felt pieces on the book and sew down the marked line. Again, pin everything and make sure the layers don't move while you sew.

I didn't pin and the pages moved :-(( Learn from my mistake, people! Pin, pin, pin!
Now it's snap time!

Let's take this moment to appreciate the awesomeness of the snap fastener tool thingy. You know what the alternative to this tool is? A hammer. Doesn't go well with my accident prone, klutzy personality. Can you imagine what I would do to myself if I had to hit a snap with a hammer? I shudder at the thought.
I love you, snap fastener tool thingy. Don't ever leave me.
Attach snaps. I like to draw an outline of the tab with a disappearing ink marker. The X marks the spot where the snap will go. Same thing on the tab.


And you're done!
Fill it up with needles and admire your work!