

Friday, December 23, 2011
Monday, December 19, 2011
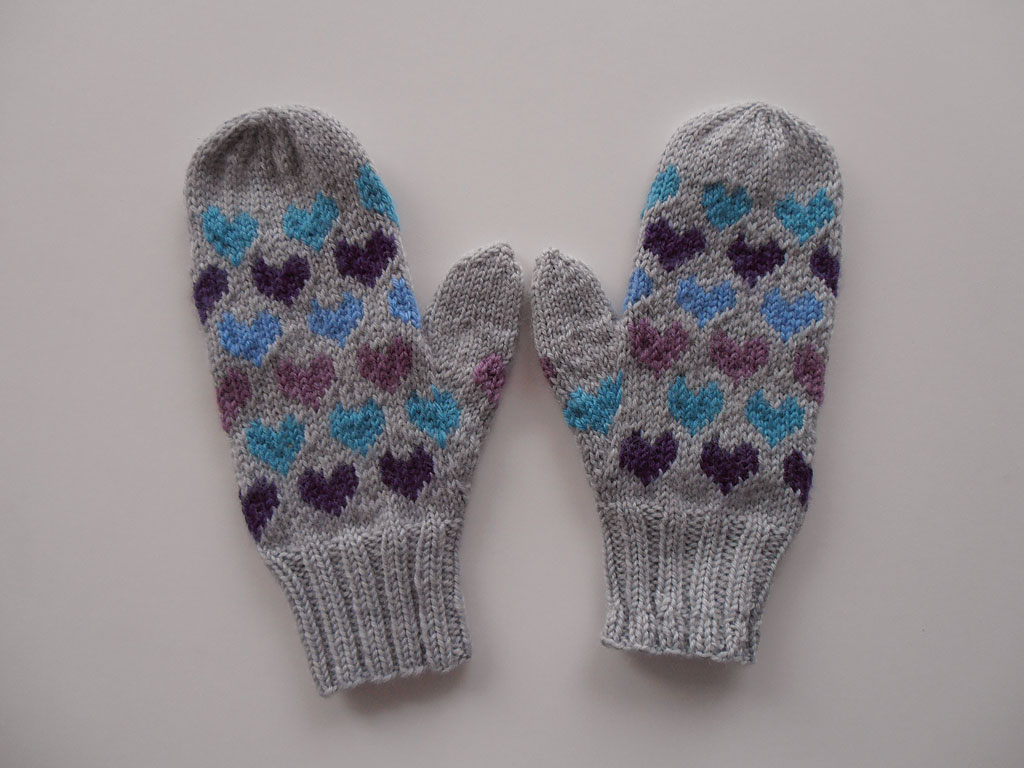
Heart Mittens
The mittens from hell are finally done.
It's was definitely a learning project for me. Here's what I learned:
- I really need a pattern when I knit stuff. Improvisation leads to frogging.
- Colorwork with both hands sucks. Or my English method sucks. Weird, distorted stitches. Can't really say I'll ever get better at it.
- Different tension produces different sized mittens. Again, yet another reason to dislike colorwork. And I really tried to maintain my tension. Damn the TENSION!!!!
- I should probably trim my fingernails.
A simple project that was only supposed to take three day tops, and yet somehow it dragged on and I managed to turn it into a hell project, by doing every single thing wrong.
The finished mittens don't look all that bad, but every time I look at them I just remember all the frustration and the stress they caused me. Maybe I'll learn to love them with time.
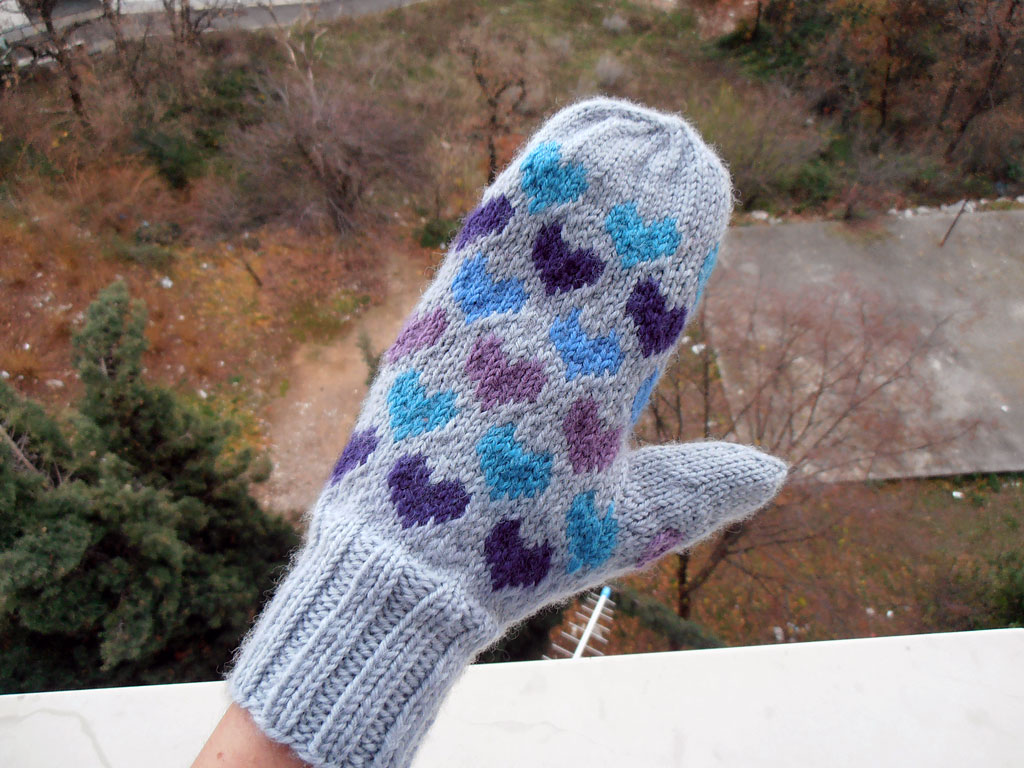
I should probably add that the colors are not so bright in real life.
Sunday, December 4, 2011
Quick! To the rip pond!
I started a mitten last week, to go with my hat. I decided to use absolutely every color of GGH Wollywash I had left. Decided to start the thumb after the second row of hearts. And then I just knit away. Is it going to be too long? Nah. Not so sure about the red color. Maybe the orange is a bit to garish? No, it isn't, what are you talking about, just keep knitting. It'll work out.
This my friends, is called denial.
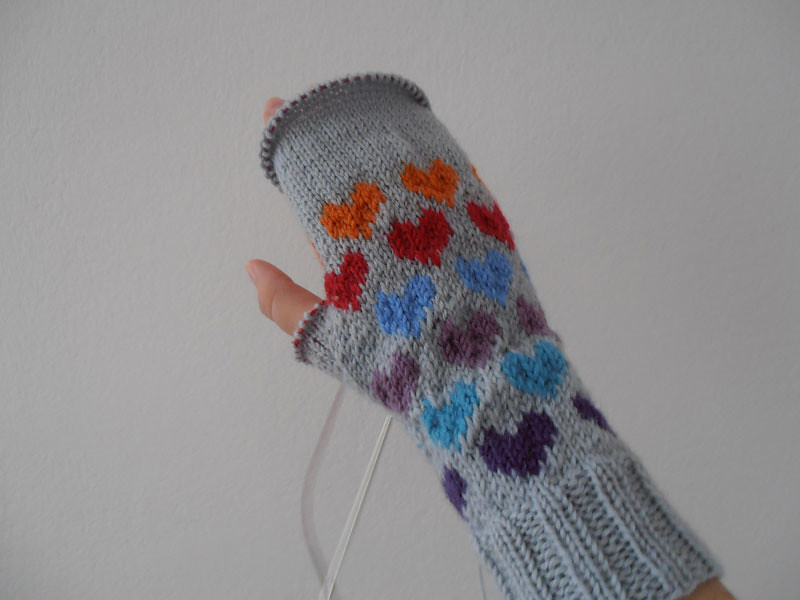
I got as far up to my pinky, and then it became evident even to my brain that it's not going to work out. The mitten is too long, the thumb is too high, and the top portion without the hearts is too long and just looks blank.
So I'm going to rip it. Start the thumb way lower, probably right after the cuff. I might keep the red color, because I don't have enough of the other colors to repeat them on both mitts, but the orange is going away.
I think I'll try a different thumb. I could end up ripping it once more, but right now my brain is telling me to go ahead - try that thumb technique you never used before, why stick with this one that works just fine for you?
Oh, brain, one of these days you and I are going to need to sit down and have a serious conversation. Saturday, November 26, 2011
From Norway with love
A friend's birthday was a few weeks ago, and I decided to make her fingerless mittens. Had to buy new yarn for them, she loves pale blue, and I didn't have anything pale blue in my stash. So I bought one skein of Ispe Padova Serenada and used up all of it. Really, after I bound off the second glove, I only had about 30 cm of yarn left. That was cutting it kind of close.
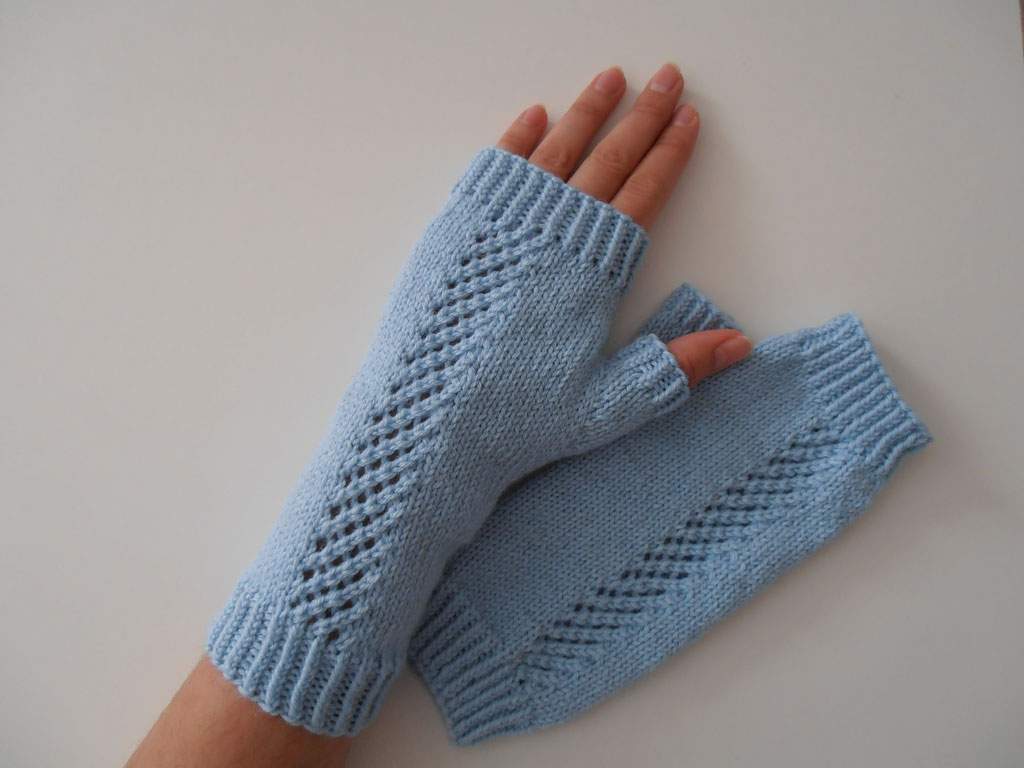
The pattern is Garden Trellis Mitts, I really like the mesh detail in the middle of the glove.
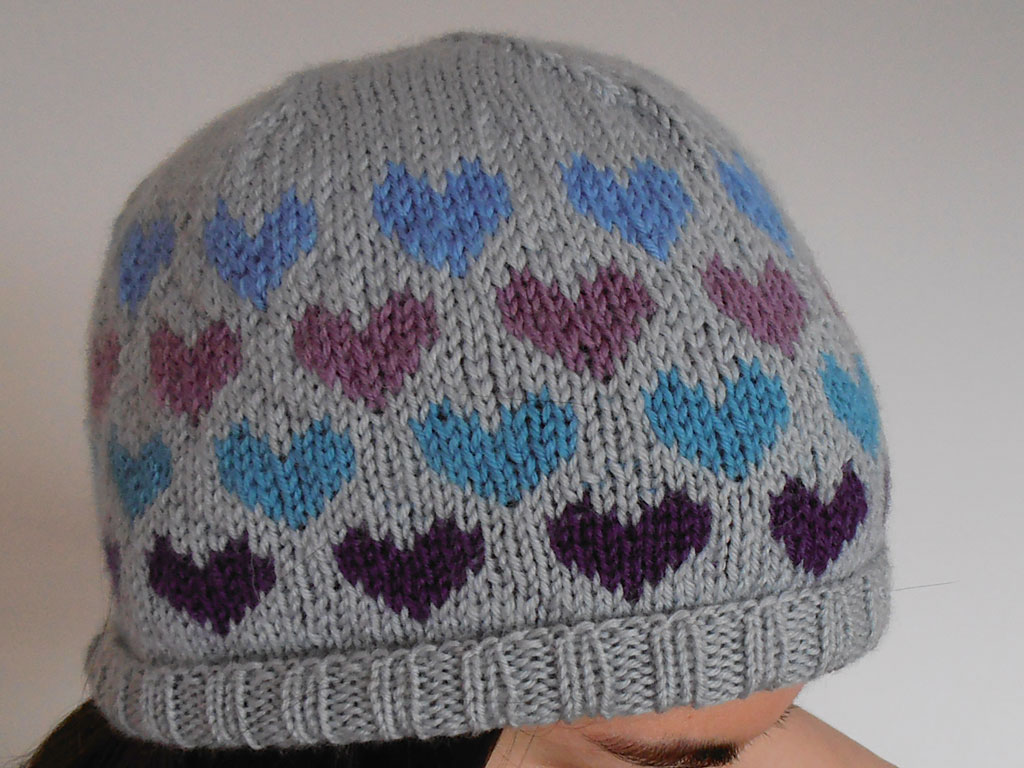
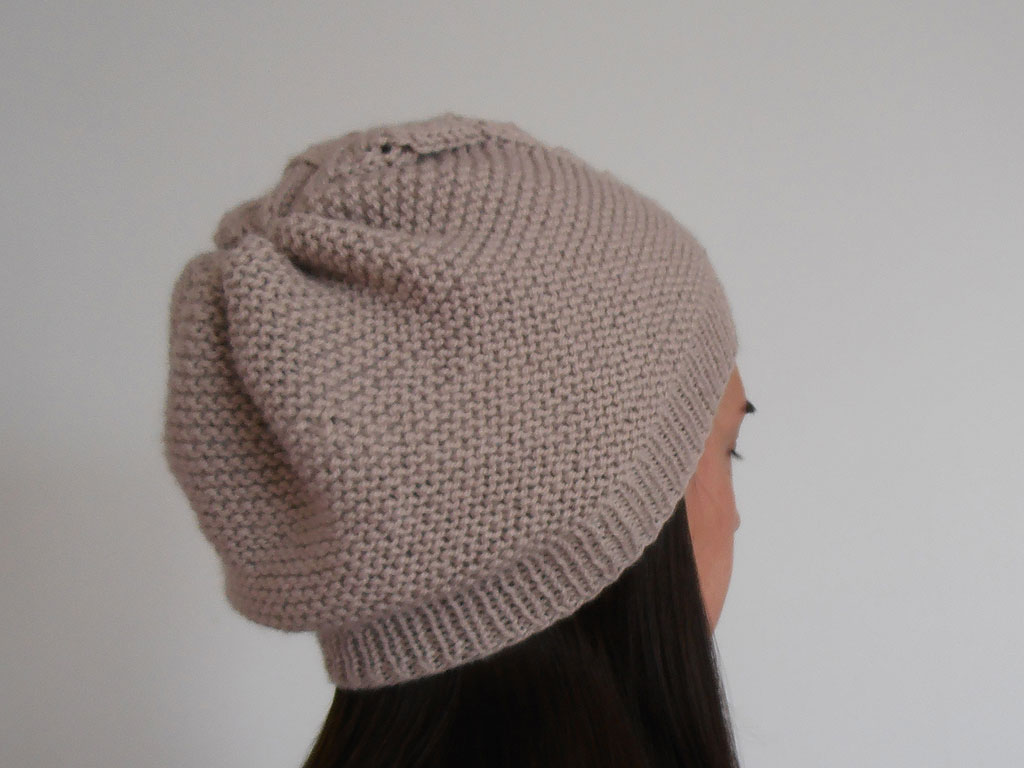
And since the mitts were done really fast, I went straight ahead on another project. And I used the yarn left from my Caitlin sweater. The From Norway with love hat was in my queue ever since I decided it was time to figure out colorwork. I can't really say I figured it out, but I certainly developed the most awkward colorwork technique ever.
I tried holding both yarns in my left hand - that only led to major tangles. I spent more time untangling the strands than actually knitting.
Then I switched to holding my main color in my left hand, and the contrast color in my right. Knitting with both hands! How exciting! How completely and totally awkward and uncomfortable!
I can't for the life of me figure out the whole English knitting thing. When I wrap the yarn, I drop the needle and sort of use my whole hand to make one single stitch. I hold the project with my knees so it doesn't go anywhere. It's slow. And creates weird and different tension compared to my Continental knitting of the main color parts. But I did the combo for this hat. And it turned out superfine, if you consider the disaster that it could have been.
You can notice funky tension here and there, but only if you look real close.
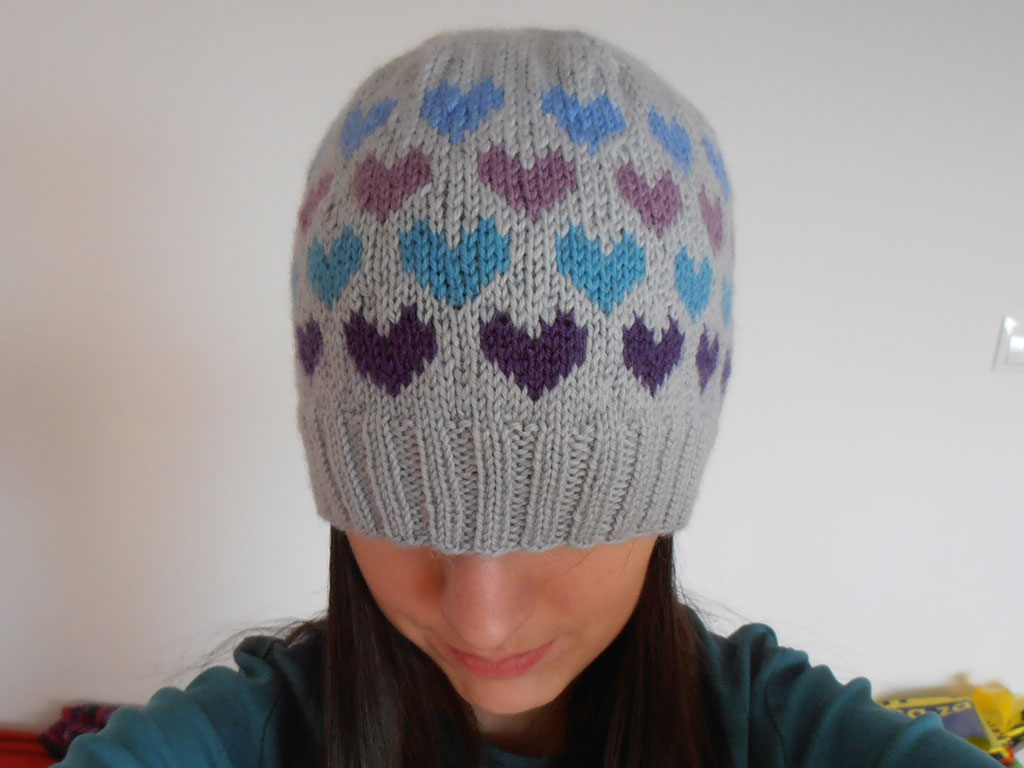 |
| Not only does it protect my ears from the cold, but my eyes as well ;) |
I just messed up the size and made it 2,5 cm too long. Ironic, since most of the hats I make barely cover my ears. But I guess I can fold the ribbing.
Before blocking this thing threatened to crush my skull, it was that tight. It's amazing how loose it became in a nice Perwoll lukewarm bath. I blocked it on a balloon, so I think that helped too.
All in all, I'm really satisfied. I love the rows of hearts. I kind of want to make a hat with rows of ducks next, to work a bit on my tension issues. But I think I'll CO for socks instead.
Sunday, November 13, 2011
Keeping my feet warm
After catching a massive cold two weeks ago, I thought it's time to be a little more proactive about my health and make sure my feet are warm. Or maybe I just wanted to use up some of my yarn. I doubt warm feet will protect me from the people that cough and sneeze in the bus.
First up - crochet slippers. Not the same size, because I really don't know how to count crochet stitches. Pattern is here.

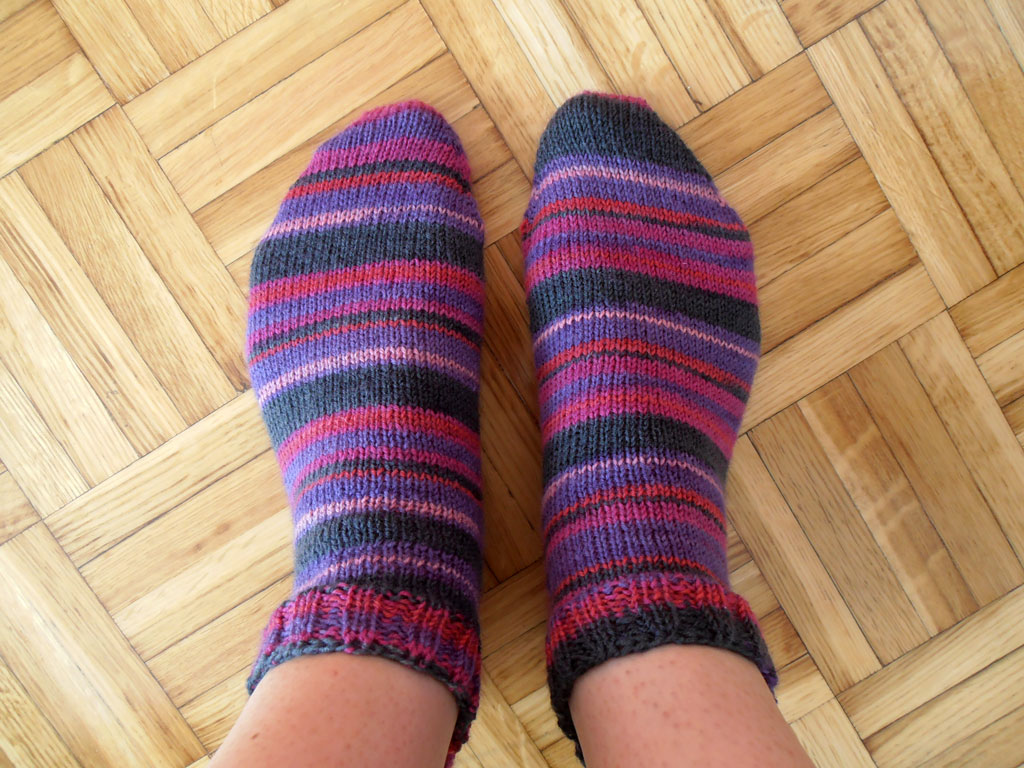
And very short socks, because I only bought one 50 g skein of Regia sock yarn. These were done two at a time on one circular needle. In retrospective, I could have made the toes a little less pointy (by casting on more stitches).
I'm also not very satisfied with my short row heels. Holes! Holes everywhere!
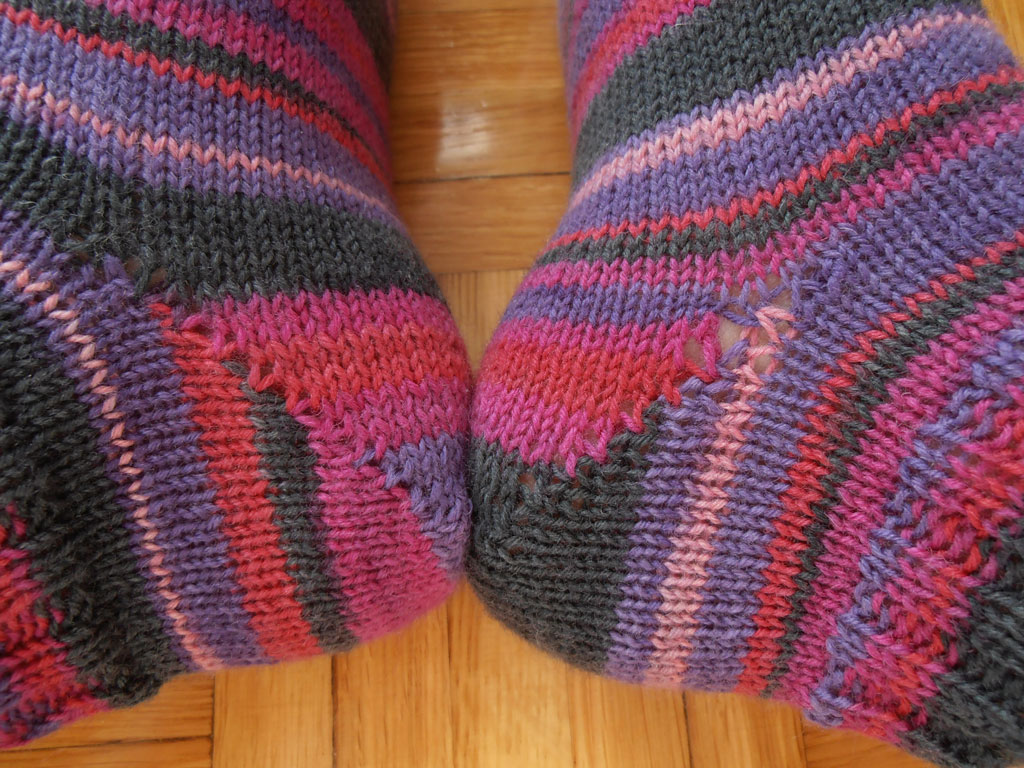
Next time I'll do some research first, to see if there's a way to avoid the holes. I'm sure there is, it seems like there's a technique for everything.
Like the amazing Judy's magic cast on and Jeny's surprisingly stretchy bind off that I used on these socks. Pure magic.
Thursday, October 27, 2011
The color of the sky
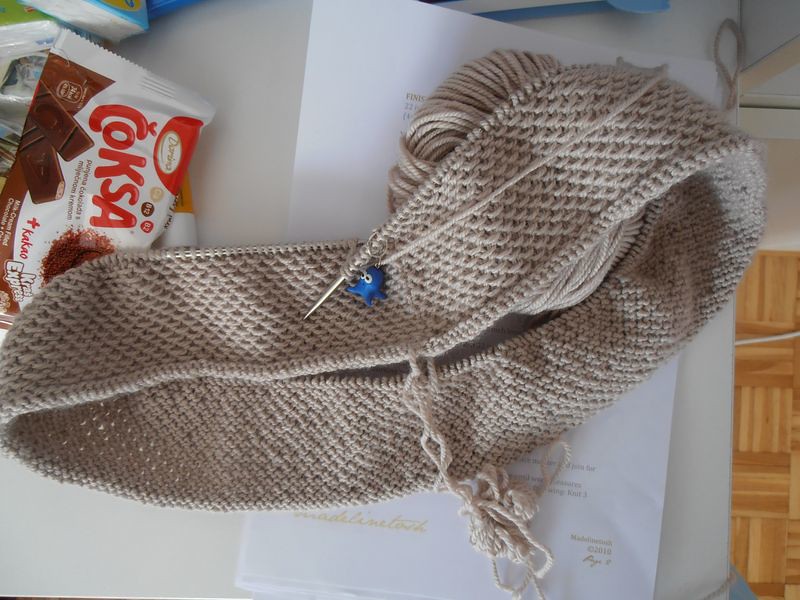
Finished my gray bag. It's about the same color as the sky was up until right now. Terrible rainy days stopped me from using it - I didn't want to get it wet. But now it looks like it's drying up, so the bag deserves a photoshoot before I put it in use and inevitably spill something on it, scrape it against a wooden fence or pull a stitch.
So here it is, in all its gray glory.


This bag was supposed to rid my stash of Marija yarn, but alas, I still have a skein and a half left. What should I do with it? Crochet something? Maybe a pair of simple slippers?
Meanwhile, I'm continuing with my stash-busting mission: I'm knitting the Honey cowl, same yarn as my Equisetum hat. So far, my stashbusting busted 8 skeins. That is a terrible result, I thought for sure I used up more of my yarn.
Is this a bad time to admit that I've been to Zagreb this weekend and bought a skein of Regia sock yarn?
Tuesday, October 11, 2011
Brainless
I almost forgot how much I enjoy making socks. Well, the
first sock at least, I always seem to get a slight case of the 'second sock
syndrome'. But making socks is awesome, especially that feeling you get when
you pass the heel, try your sock on and it actually looks like a sock. I'm very
proud of myself in those moments.
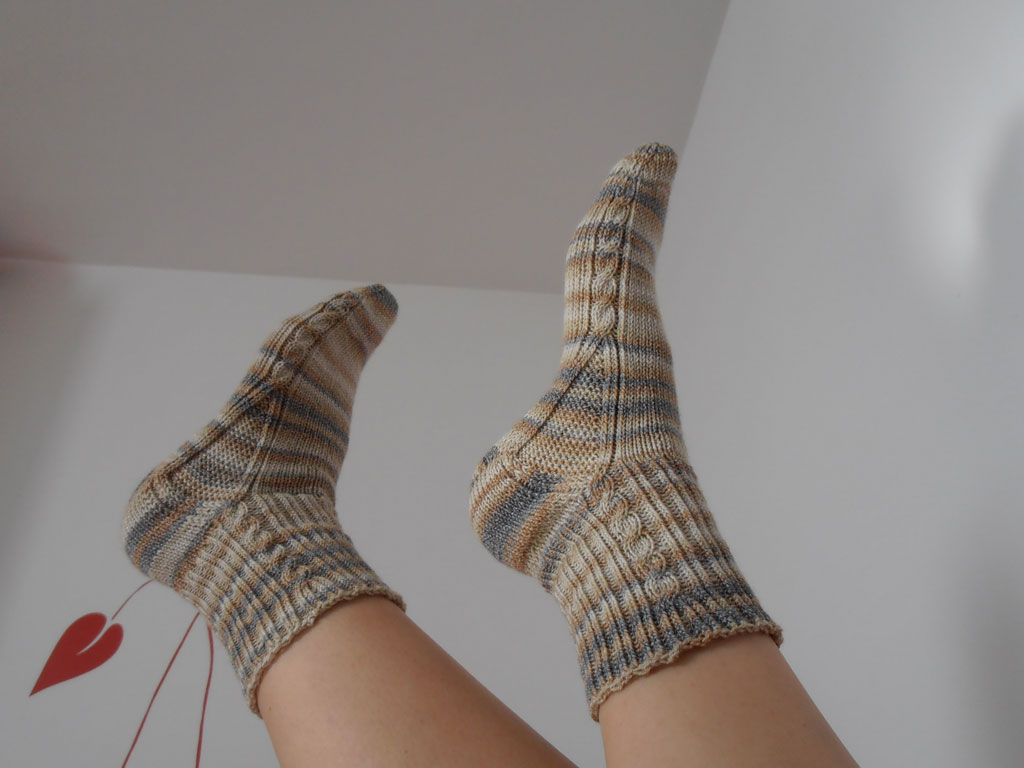
The pattern is Brainless by Yarnissima.
These socks were my first ones done in actual sock yarn. And
by that I mean I used yarn that says 'sock yarn' on the label. It's Müller
Super Sport Strumpf, this was pretty much the only color they had left. Someone
in Zagreb had raided the yarn stand in the Müller drugstore by the time I got
there.
Still, this was a nice blend of neutral colors and the yarn
is not hairy like some yarns tend to be, so I got a pair of nice, smooth socks.
The pattern was a bit confusing, I must have read and
re-read that thing a hundred times before I finally figured out what it wants
me to do. But it was worth it, I love the way these socks turned out.
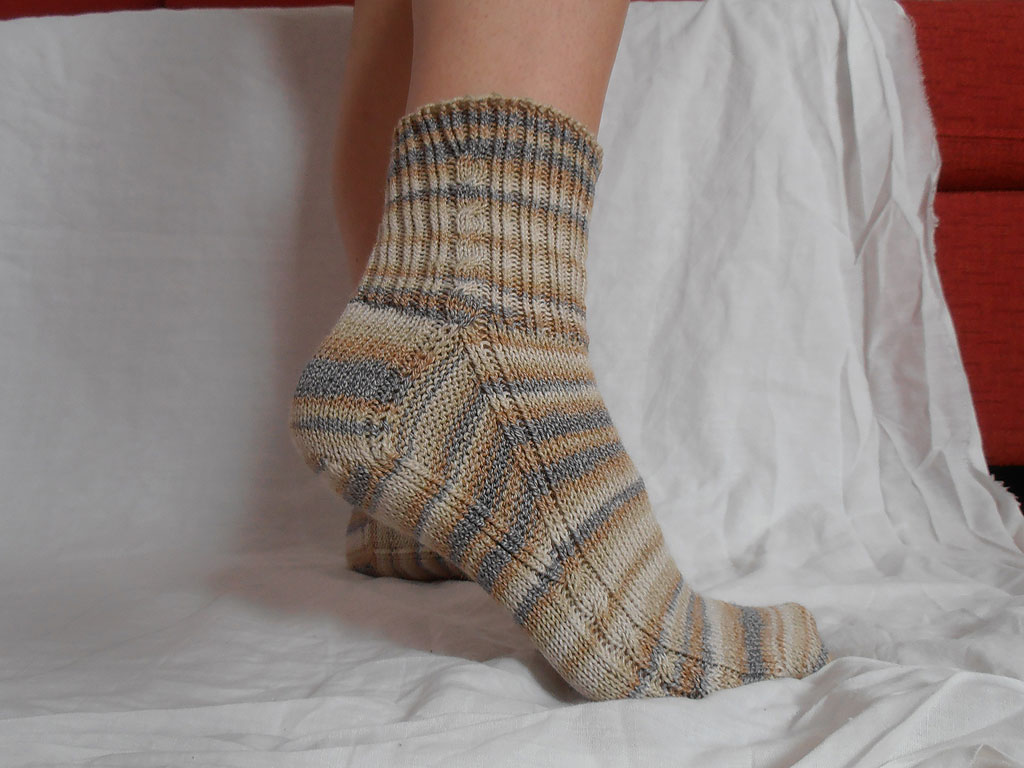
Especially the cables that run along the side of the toe, then part in the
gusset section and turn back into a cable on the leg part.
Pretty satisfied with the short row heel as well, no holes
in my wraps and turns for once.
Next project: Drops bag form Marija (Unitas yarn). I hate
this yarn. It's not stretchy, it's coarse, I think the needle requirement on the
label is wrong and I just really, really dislike it.
And in addition to being a yarn snob, I think I also became a needle snob. After knitting with Knitpro needles, the other brands are just not good enough. The ones I'm using here are Prym. Not as smooth as the Knitpro and the cable is not as bendy. Combined with the awful yarn, knitting this bag is making my hands hurt.
But at least I'm using up my stash.

Monday, September 26, 2011
Two tiny hats. And one for my big noggin.
So, a coworker is pregnant, and has asked me to knit a hat for the baby. She doesn't know the sex yet, so I tried to choose a pattern that would work for a boy or a girl. I think I failed, both hats are sort of girly, but I'm going to ignore that and hope the baby turns out to be a girl. She already has a son, and I got the impression she wants this one to be a girl. So I'm just sending girl vibes, right?
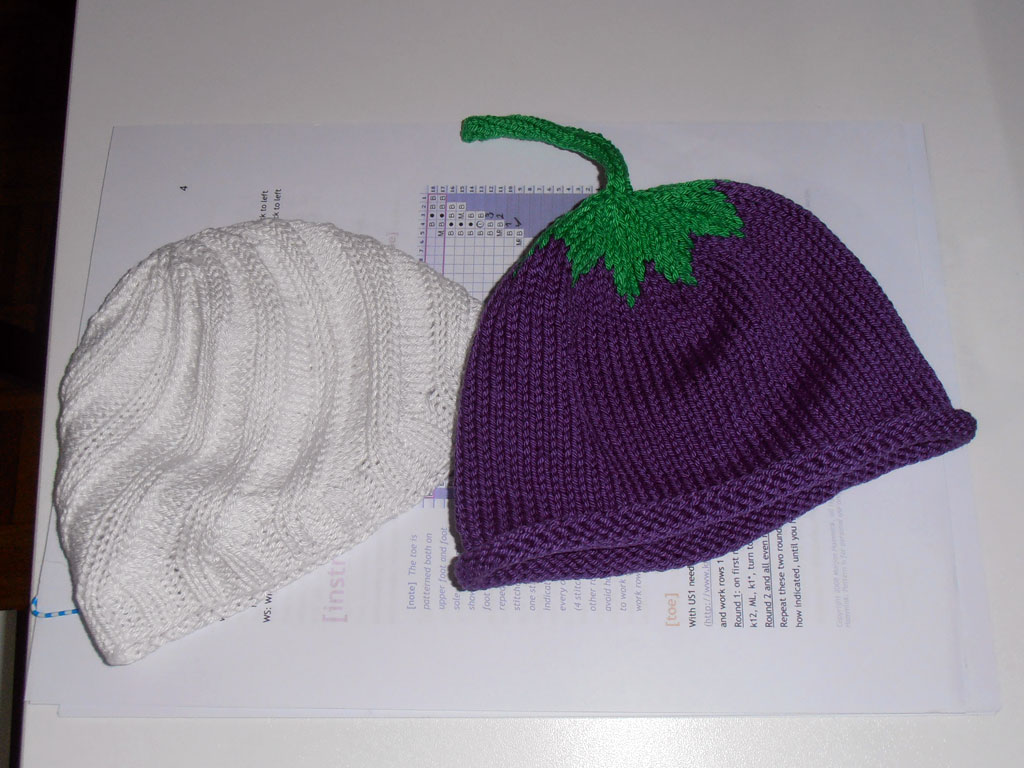
I also made something for myself. Because, when it comes to knitting, I'm my own best customer. And all that stuff about the joy of giving and knitting for others - I feel the biggest joy when I knit something for ME. Yup, selfish. But honestly, would you give something like this away?

The pattern is
Equisetum. Words can't describe what a great pattern it is. It's simple to follow, even tough it's only written, no chart. It comes out beautifully, and I love the effect the wraps give. Never did anything like it before, I'm really pleased it turned out so well.
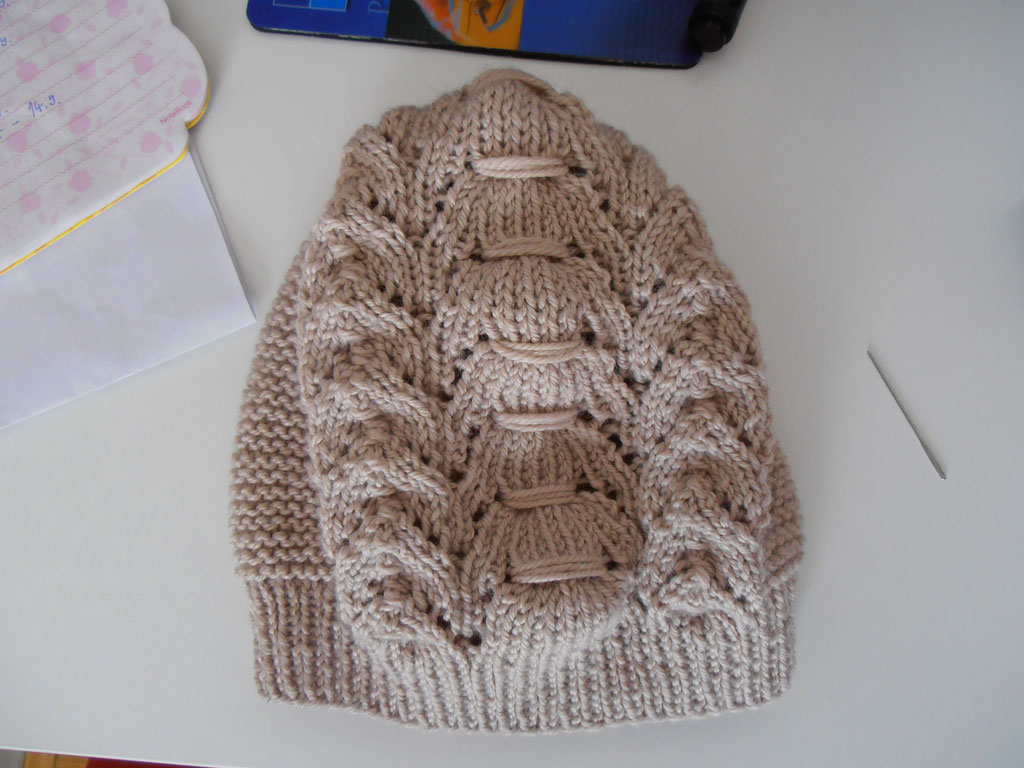
The pattern is knit flat, I did mine in the round, which meant purling every other row and making sure to turn the knits into purls and vice versa. There are a few not-so-pretty purl bumps, from where I added new yarn. Turns out, I only know how to hide the new ends on plain stockinette.
The yarn is Rozetti First Class, super soft and nice to work with. I did find 3 knots in the first skein, but none in the second skein, so I guess it was just a bad skein. I absolutely hate those stupid knots that sneak up on you just when you think your knitting is coming along beautifully.
Next project - socks. For real this time, I think I finally found a pattern. Brainless. But I also have a skein and a half of the Rozetti yarn left, and I want to use that up. Maybe a cowl? So many potential projects, so little time to knit them.
Friday, September 16, 2011
Uhura
After summer sewing, here's some summer knitting for ya. It took me pretty much the whole summer to knit this shirt.
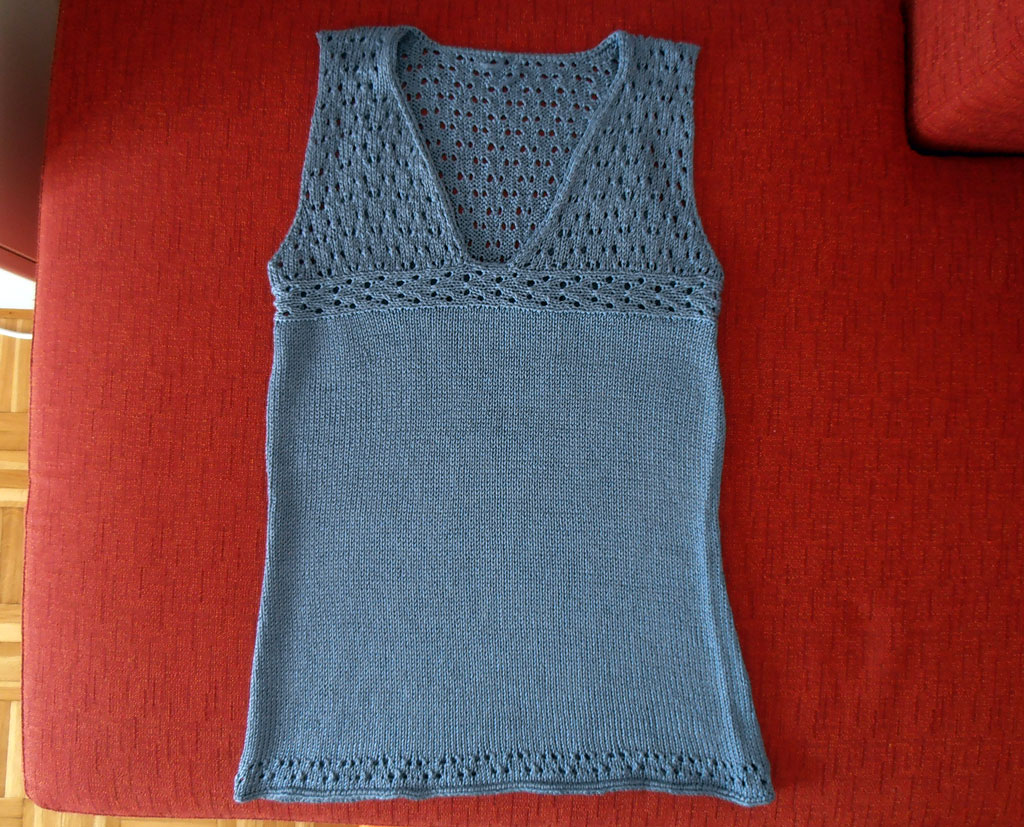
The pattern is Uhura, the yarn is Dada nova. I bought 5 skeins of it and used up absolutely all of it. I did a crochet border around the neck, but didn't have enough yarn to do the same around the arms.
I omitted the keyhole thingy, because the neckline is already low enough, no need to have my bra peeking trough that hole.
I knit the top parts first, sewed it all together, then picked up stitches on the bottom of the band and did the body in the round.
I didn't do the folded hem the pattern calls for - instead I knit 6 rows of the lace chart and crocheted around the bound off edge to stop it from rolling.
 |
| Wow, look at the pattern this zoomed out picture is producing. Zebra. |
 |
| Click the image to de-zebrafy. |
Next project : anything to use up some of the yarn I have in my stash. I had my mind set on socks. Have the yarn, got the needles. Now all I need is to find a pattern. But guess what? There are THOUSANDS of sock patterns on Ravelry. How am I supposed to choose one?
Monday, September 12, 2011
A tale of many shorts
My summer sewing bug seems to have left me. The sewing machine is in its case, and my sewing motivation is currently at 0%. Until next summer, I guess. Or somebody's birthday.

I based all of these on shorts from the store - I just traced the shapes and sewed the pieces together. With great success, I might add.
 |
| I hope you can tell this thing has pockets. |
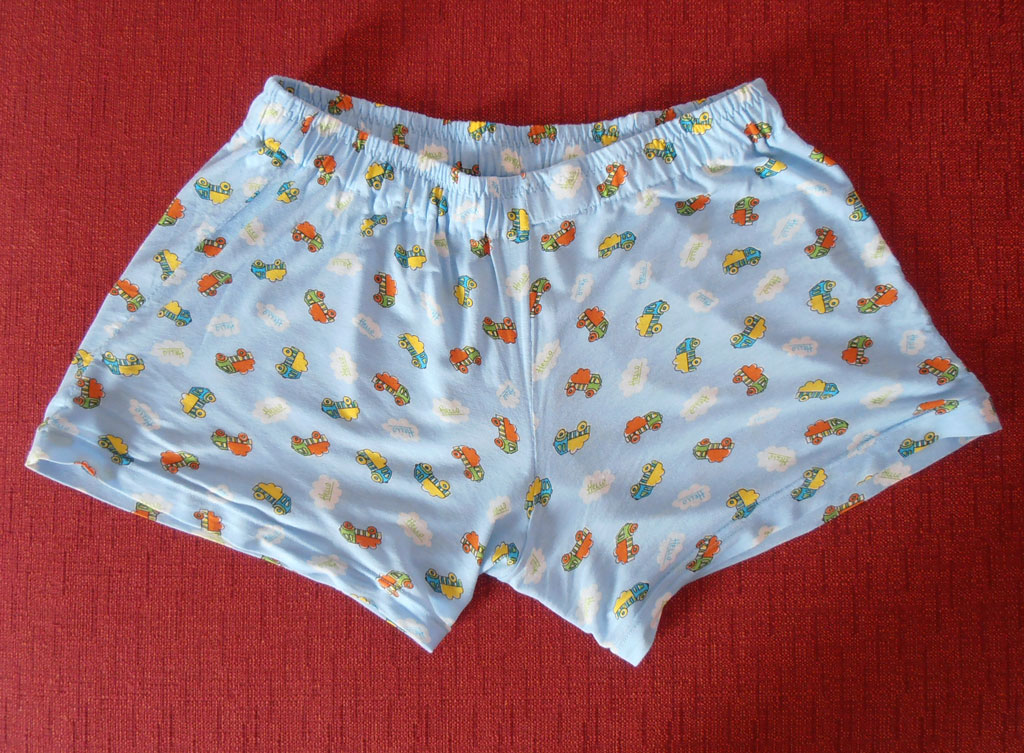 |
| Boxers. They make a nice summer PJ shorts. |

So that's pretty much it. It's still very warm here, so I still have a chance to wear these before I put them away for the winter. And maybe next year I'll sew some tops.
Monday, August 22, 2011
Needle Book Tutorial (my first)
I love online tutorials. I learned so much from them and the bloggers who share them. So I thought I'd give back with a tutorial of my own. Nothing new, or original, just a simple sewn needle book.


This is my first tutorial. And it's actually more of a 'what not to do' than 'what to do'.
But you get to learn from my mistakes and I get to use some of my fabric scraps, so it's all good.
Let's get started!
What you'll need:

For the pocket: Cut another rectangle the same width as the other two, but make it half the height plus one centimeter for folding.
For the tab closure: More rectangles! Cut one of main fabric and one of lining.
The dimensions of this needle book are up to you: the main point is that the finished thing can hold your needles. Oh, and make sure that a snap closure can fit on the finished tab.
My dimensions were as follows: 18 cm x 13 cm for the main body parts, 18 cm x 8 cm for the pocket and 5 x 10 cm for the tab (I gave myself plenty of seam allowance for the tab, and ended up cutting most of it off). This gave me a finished needle-book that measures 15 x 11,5 cm when opened. Not the dimensions I was hoping for, but still, not too bad.
Iron all the pieces and add interfacing if your fabric is too flimsy. I ironed interfacing on the lining.
With right sides together sew around three sides of the tab (I ended up sewing it up to the dimensions of 3 cm x 10 cm, which was way too long. But more on that later). Trim the seam allowances and make sure to trim the corners to remove the bulk. This makes for a nicer corner when you turn the tab to the right side. So, do just that - turn the tab to the right side, iron it and topstitch around the three sewn sides.

Notice how my tab corners aren't exactly crisp and nice? This is because I didn't clip enough of the seam allowance off. I make these mistakes so you don't have to!
Take the pocket piece and fold down the top edge by one centimeter. Iron it, then topstitch it.

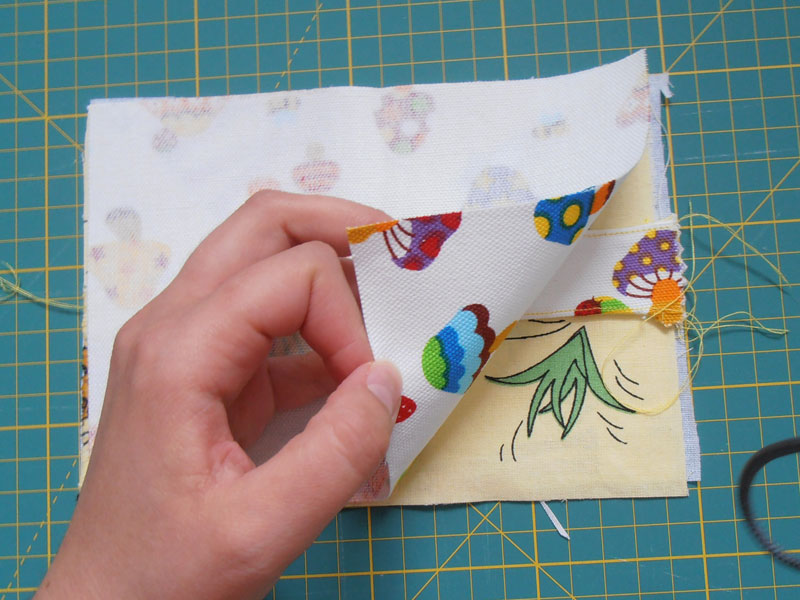
Ok, now let's make a sandwich!
Take your lining piece, place it right side up. Put the pocket on top of it, also right side up.
Take the tab and place it with its short unfinished edge on the center of the right side of the lining piece. The tab will be inside the sandwich, the tab's lining side is touching the lining of the needle book and the pocket, the outside fabric is facing up.

See this? All wrong!! Place the tab so that it sits about 2/3's from the center of the needle book. I ended up moving it - away from the giraffe, closer to the zebra. Again, I make these mistakes, so you don't have to ;)
Place the outside fabric right side down on the lining, the pocket and the tab. Pin everything so that it doesn't move around while you sew.
Sew around, leaving an opening to turn it. Like so:

See how much of the tab I had to move and cut off? I also didn't pin, so my tab isn't exactly centered. But you pinned, right?
Trim the seam allowances and clip the corners. Turn everything right side out, iron it and topstitch all around.


By topstitching you closed the hole you left for turning. And it looks nicer now. Hopefully your corners look prettier than mine.
Now it's time to cut the felt for the needle book pages. Just measure your finished book, subtract about a centimeter on top and one side (you don't want your 'pages' to stick out of the book) and cut the felt according to those measurements. Three felt rectangles make for six needle book pages. You can cut more if you've got a bazillion needles that you need to put in the book - just make sure your machine can stitch trough all those layers.
I've cut mine 14 cm x 9,5 cm.
Mark a line with a water soluble marker (or a pencil or something) down the center of the felt rectangles.

Place the felt pieces on the book and sew down the marked line. Again, pin everything and make sure the layers don't move while you sew.

I didn't pin and the pages moved :-(( Learn from my mistake, people! Pin, pin, pin!
Now it's snap time!

Let's take this moment to appreciate the awesomeness of the snap fastener tool thingy. You know what the alternative to this tool is? A hammer. Doesn't go well with my accident prone, klutzy personality. Can you imagine what I would do to myself if I had to hit a snap with a hammer? I shudder at the thought.
I love you, snap fastener tool thingy. Don't ever leave me.
Attach snaps. I like to draw an outline of the tab with a disappearing ink marker. The X marks the spot where the snap will go. Same thing on the tab.


And you're done!
Fill it up with needles and admire your work!


Wednesday, August 10, 2011
Using up my fabric
I'm still on a mission. A 'fabric-using-up' mission. After hours and hours of sewing here's the total fabric used up: One fat quarter. That's about 45x50 cm. Otherwise known as a needle in my fabric haystack. Who knew you can make at least 3 different things from just one fat quarter?
So here they are:
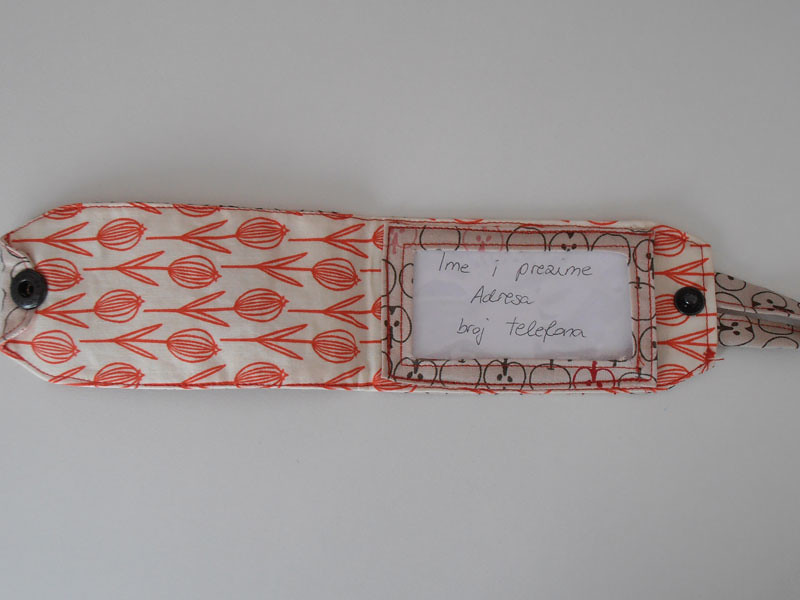
 |
| Cutlery holder that needs buttons. |
 |
| Made in attempt to eat healthier at work. |
 |
| Flash. Oohooh. Savior of the Universe! |
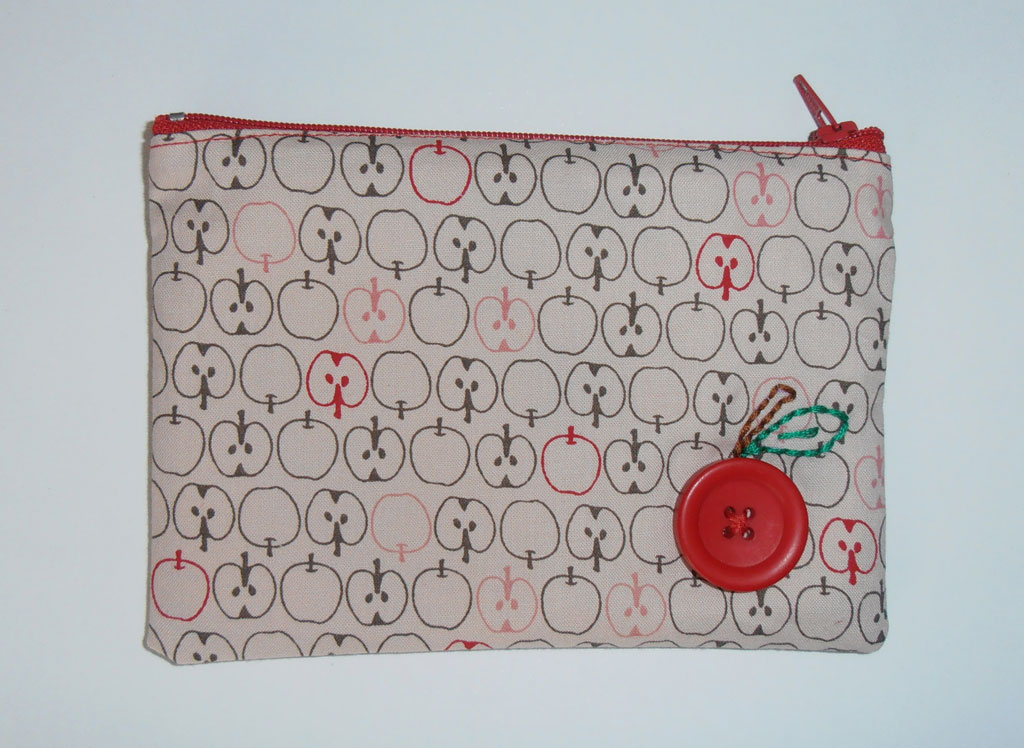
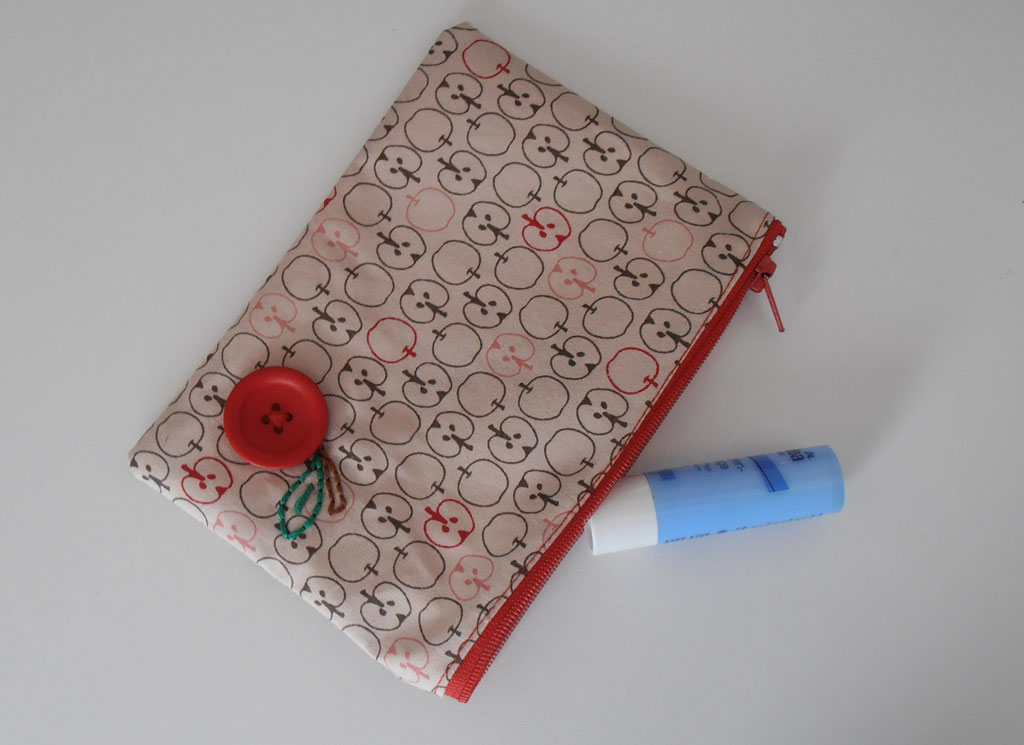 |
| I do love making zipper pouches. Fast and easy. |
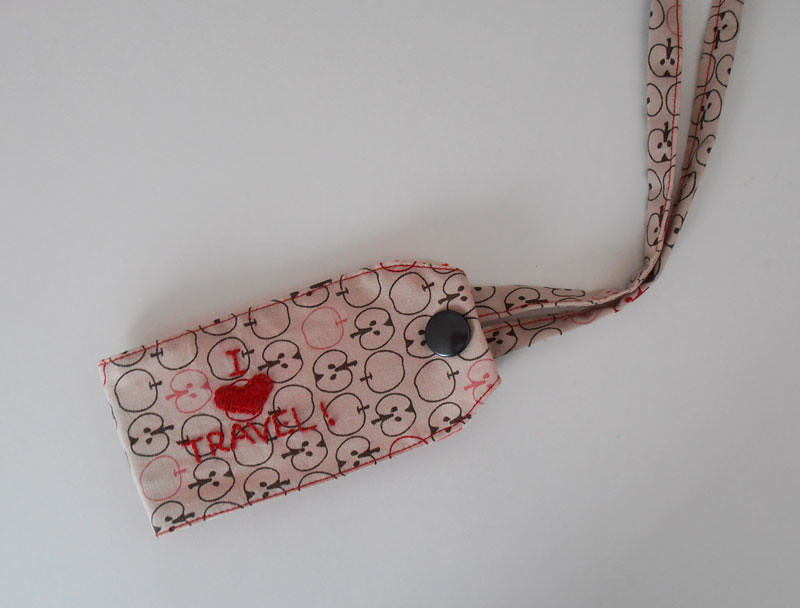 |
| I don't. This was meant for a friend. But then... |
 |
| ... I burned the plastic with my iron. Now it's ungiftable. |
Subscribe to:
Posts (Atom)